Refers to the process of identifying, diagnosing, and resolving problems with the physical components of a computer system. This can include issues with internal parts like the motherboard, CPU, RAM, and hard drive, or external peripherals like monitors, keyboards, and printers. The goal of hardware troubleshooting is to pinpoint the root cause of the malfunction and implement a solution to get the system functioning properly again. This might involve anything from reseating a loose cable to replacing a faulty component.
The hardware troubleshooting process follows a systematic approach to efficiently identify and fix the problem. Here's a breakdown of the key steps:
Identify the Problem:
This seems straightforward, but it's crucial. Clearly define the symptoms you're experiencing. Is the computer not turning on? Is there a specific error message? Are certain components malfunctioning? Precise details help narrow down potential causes.
Establish a Theory of Probable Cause:
Analyze the symptoms and research potential causes. Consider recent changes made to the system or if the issue started abruptly. Common causes might be loose connections, overheating, or failing components.
Test the Theory to Determine the Cause:
Here's where the troubleshooting gets hands-on. You can try various methods to isolate the problem. This might involve reseating cables, testing components in another system (if possible), or running diagnostic software.
Establish a Plan of Action and Implement the Solution:
Based on your findings, determine the most suitable solution. This could involve replacing a faulty component, cleaning dust buildup, or updating drivers. If the problem is beyond your expertise, consider seeking professional help.
Verify Full System Functionality and Implement Preventive Measures:
Once you've implemented the solution, test the system thoroughly to ensure everything functions as expected. This helps confirm the issue is resolved. As a final step, consider preventive measures to minimize the risk of similar problems in the future. This might involve regular cleaning, keeping software updated, or using surge protectors.
Common Hardware Problems and Troubleshooting
Here's a breakdown of two common hardware problems you might encounter, along with potential causes and solutions:
Computer Won't Turn On
This is a frustrating scenario, but there could be several reasons behind it. Let's explore some possibilities:
Cause: Power Supply Issues
The power supply unit (PSU) provides power to all your computer's components. If it malfunctions, your system won't even attempt to boot up.
Solutions:
Check Connections: Ensure the power cable is securely plugged into both the wall outlet and the PSU at the back of your computer.
Test with a Different Outlet: Try plugging your computer into a verified working outlet to rule out a faulty wall socket.
Inspect the Power Cable: Look for any visible signs of damage on the power cord, such as fraying or kinks. If damaged, replace it with a new one. (Important Safety Note: Only use the power cable that came with your PSU or a manufacturer-approved replacement.)
Cause: Loose Connections
Internal components rely on cables to connect to the motherboard and receive power. A loose cable can disrupt this connection and prevent the system from starting.
Solutions:
Open the computer case (refer to your system's manual for safe opening instructions) and check all internal connections, especially those leading to the motherboard, hard drive, and any optical drives.
Reseat the cables by gently unplugging and plugging them back in firmly. Pay attention to ensure proper alignment and connection.
Cause: Faulty Motherboard or Other Components
While less frequent, a malfunctioning motherboard or another crucial component like the CPU or RAM could be the culprit.
Solutions: (Advanced Troubleshooting)
Testing Components in Another System (if possible): If you have a compatible system available, try swapping components like RAM or the graphics card one by one to see if the issue persists. This can help isolate the faulty part.
Consult a Professional: If the above steps don't resolve the problem, seeking assistance from a qualified computer technician is recommended, as further diagnosis and component replacement might be required.
Computer Turns On But Still Doesn't Work
Even if your computer shows signs of life by powering on, you might encounter various issues that prevent it from functioning correctly. Here are some common problems:
Cause: No Display
The issue could lie with the monitor, graphics card, or the connection between them.
Solutions:
Check Monitor Connection: Ensure the monitor cable is securely plugged into both the computer's graphics card (or onboard video port) and the monitor itself.
Test with a Different Monitor: Try connecting your computer to a known-working monitor to isolate whether the problem lies with your primary monitor.
Reseat the Graphics Card (if applicable): If you have a dedicated graphics card, open your computer case and carefully remove and reseat the card in its PCIe slot on the motherboard.
Cause: Strange Noises or Overheating
Unusual noises like grinding fans or excessive heat could indicate failing hardware, dust buildup, or inadequate ventilation.
Solutions:
Clean Dust Buildup: Open your computer case and carefully clean dust from fans, vents, and heatsinks using compressed air. Be gentle and avoid spinning the fans manually.
Ensure Proper Ventilation: Make sure your computer has sufficient airflow by placing it in a well-ventilated area and not blocking its vents.
Cause: Slow Performance or Freezing
This could be caused by various factors like insufficient RAM, failing hard drive, malware infection, or outdated software.
Solutions:
Monitor Resource Usage: Check your system's task manager to see if any programs are consuming excessive CPU or RAM, potentially causing slowdowns.
Run a Disk Check: Use built-in disk utility tools to scan your hard drive for errors.
Consider Upgrading RAM: If your RAM usage is consistently high, consider adding more RAM to improve system performance.
Scan for Malware: Run a reputable antivirus scan to rule out malware that could be affecting performance.
Troubleshooting a Freezing Computer: Insufficient Memory & CMOS Error
A computer freezing can be caused by various issues, but two potential culprits you mentioned are insufficient memory and a CMOS error. Let's tackle each one:
Insufficient Memory (RAM):
Symptoms:
Frequent freezing, slow performance, lagging when running multiple programs, unexpected program crashes.
Solutions:
Identify Memory Usage: Open your computer's task manager and monitor RAM usage. If it consistently reaches high levels (80% or above), adding more RAM can significantly improve performance.
Upgrade RAM (if possible): Check your system's specifications to determine the type and maximum amount of RAM it supports. Consider adding compatible RAM modules to increase available memory.
Close Unnecessary Programs: Close any programs you're not actively using to free up RAM.
Reduce Startup Programs: Many programs automatically launch at startup, consuming resources. Use your system settings to disable unnecessary startup programs.
CMOS Error:
Symptoms:
Freezing during bootup, unexpected system restarts, incorrect date and time settings.
Solutions:
Reset CMOS Settings: Most systems have a jumper on the motherboard to reset CMOS settings to factory defaults. Consult your system's manual for specific instructions on locating the jumper and resetting the CMOS. (Caution: Resetting CMOS might clear BIOS settings like overclocking configurations or custom boot options. Make sure you know how to reconfigure these settings if needed.)
Replace CMOS Battery: A dead or dying CMOS battery can cause the settings to lose power and become corrupt. Replacing the CMOS battery is a relatively simple process. (Important Safety Note: Always ensure your computer is unplugged and turned off before opening the case and replacing the battery.)
Additionals
Monitor System Temperature: High temperatures can cause instability and freezing. Ensure proper ventilation for your computer and clean dust buildup from fans and heatsinks.
Scan for Malware: Malware infections can consume resources and cause system instability. Run a reputable antivirus scan to rule out this possibility.
Update Drivers: Outdated drivers can sometimes lead to conflicts and instability. Update your device drivers, especially the graphics card driver, to ensure compatibility.
Troubleshooting Missing OS, Undetected HDD, and Blue Screen of Death
These issues can be interconnected and frustrating to deal with. Let's break them down and explore some solutions:
Missing Operating System (OS) or Undetected Hard Disk Drive (HDD):
Symptoms:
The computer might not boot up completely, displaying an error message about a missing operating system or unable to locate a boot device.
Solutions:
Check Boot Order: Enter your system's BIOS (or UEFI) settings (usually by pressing a specific key during startup, like F2 or Del). Consult your motherboard manual for the exact key. In the BIOS settings, ensure the hard drive containing your operating system is listed as the first boot device.
Secure Boot: If your system has Secure Boot enabled in the BIOS, it might prevent booting from certain drives. Try temporarily disabling Secure Boot to see if it resolves the issue. (Note: Disabling Secure Boot might have security implications. Refer to your system's documentation for more information.)
Reconnect Cables: Open your computer case (refer to your system's manual for safe opening instructions) and reseat the data and power cables connecting the hard drive to the motherboard. Ensure all connections are secure.
Hard Drive Failure (Advanced Troubleshooting): If the above steps don't work, the hard drive itself might be failing. You can attempt to use data recovery software, but in severe cases, data recovery might be necessary by a professional data recovery service.
Blue Screen of Death (BSOD):
Symptoms:
The computer suddenly crashes, displaying a blue screen with white text and error codes. This can happen during startup or while using the system.
Solutions:
Identify the Error Code: The BSOD message usually displays an error code. Look up this code online to identify the potential cause of the crash. Some common causes include faulty hardware, software conflicts, or corrupt drivers.
Windows Startup Repair: If you have a Windows installation media (USB drive or DVD), you can boot your system from it and try the Startup Repair option to attempt to automatically fix startup issues.
Update Drivers: Outdated drivers can sometimes lead to BSODs. Update your device drivers, especially the graphics card driver, to ensure compatibility.
Run a System File Checker: Windows has a built-in tool (SFC /scannow) that can scan for and fix corrupted system files. This might help resolve BSODs caused by software issues.
The contents of an ideal IT technician Toolkit
Essential Tools for IT Technicians
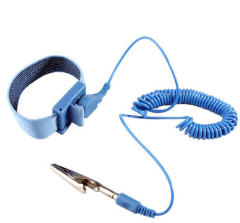
1. AntiStatic Wrist Strap
Image:Function: Protects sensitive electronic components from electrostatic discharge (ESD) which can damage them during repairs or upgrades. When working on a computer's internals, it's crucial to wear a grounded wrist strap and use an ESD-safe mat to dissipate static electricity.
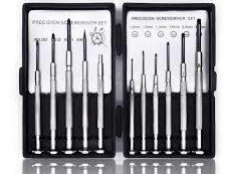
2. Precision Screwdriver Set
Image:Function: Required for opening computer cases, replacing components like RAM or storage drives, and making various adjustments. A good set includes Phillips head, flathead, and Torx screwdrivers in various sizes to fit different screws encountered in computer hardware.
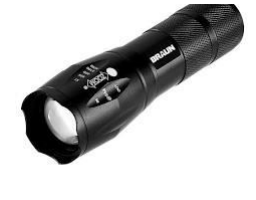
3. Flashlight
Image:Function: Provides illumination for seeing into tight spaces within a computer case, especially helpful when inspecting components or troubleshooting cabling issues.
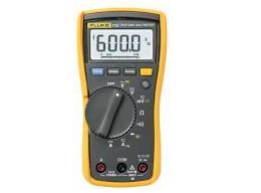
4. Digital Multimeter
Image:Function: A versatile tool for measuring voltage, current, and resistance. It can be used to diagnose power supply issues, check for continuity in circuits, and troubleshoot faulty components.
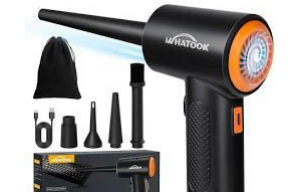
5. Compressed Air Duster
Image:Function: Safely removes dust buildup from computer components like fans, heatsinks, and vents. Dust accumulation can impede airflow and lead to overheating, so regular cleaning is essential for maintaining optimal system performance.
6. Cable Tester
Image:Function: Helps identify faulty network cables (Ethernet cables) that might be causing connectivity problems. A cable tester can quickly diagnose cable integrity and pinpoint issues like breaks or shorts in the wiring.
7. USB Flash Drive
Image:Function: Useful for transferring files, running diagnostic tools, or installing operating systems. Technicians often carry bootable USB drives containing system recovery tools or diagnostic software.
8. Laptop Caddy or Carrying Case
Image:Function: Provides a safe and organized way to transport tools and spare parts to various work locations. A well-compartmentalized case protects tools from damage and keeps them readily accessible.
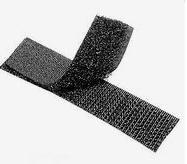
9. Zip Ties and Velcro Straps
Velcro Strap Image:Zip Ties Image:Function: Aid in cable management within the computer case. Zip ties and velcro straps help keep cables organized and prevent them from obstructing airflow or creating clutter.
10. Notebook and Pen
Image:Image:Function: Essential for documenting troubleshooting steps, keeping track of error codes, and recording notes during repairs or maintenance procedures.
By having these tools readily available, IT technicians can efficiently diagnose and resolve a broad spectrum of computer hardware and software issues.
Microprocessor Components
The Microprocessor:
The microprocessor, often called the CPU (Central Processing Unit), is the brain of the computer. It's a single integrated circuit (IC) that fetches, decodes, executes instructions, and processes data. It relies on several key components working together to achieve this goal. Let's delve into each component and its role:
1. The Microprocessor Itself:
Imagine the microprocessor as a conductor in an orchestra. It leads the entire process, ensuring all components work in unison. Here's a simplified breakdown of its internal operations:
Fetch: The microprocessor retrieves instructions from memory (RAM) using the address bus. This address bus acts like sheet music telling the orchestra which section plays next.
Decode: The fetched instruction is then broken down into its component parts (opcode and operands) to understand what needs to be done.
Execute: Based on the decoded instruction, the microprocessor directs other components like the ALU (Arithmetic Logic Unit) or performs data transfer operations.
2. The Register Element:
Think of registers as the lead musicians in the orchestra. They hold small amounts of data that the microprocessor needs to access immediately. These registers are like the conductor's music stand, holding the current sheet music for quick reference. There are different types of registers, each with a specific purpose:
Accumulator (ACC): Often used for storing temporary results during calculations.
Program Counter (PC): Keeps track of the memory address of the next instruction to be fetched. It's like the conductor keeping his place in the sheet music.
Instruction Register (IR): Holds the instruction currently being decoded by the microprocessor. Imagine the conductor briefly glancing at the next section of music before signaling the orchestra.
Data Registers: Used for storing operands (data values) involved in calculations or data transfers.
3. The Data Bus:
The data bus acts like the communication highway within the computer system. It's a group of wires that carries data between various components – the microprocessor, memory (RAM), and I/O devices. Imagine this as the cables connecting different sections of the orchestra, allowing them to share notes and instructions. Data, such as numbers or characters, travels on this bus based on the instructions being executed.
4. The Address Bus:
The address bus works hand-in-hand with the data bus. It's another group of wires responsible for specifying the memory location of the data being transferred. Think of this as the conductor pointing to specific sections of music in the sheet music, telling the musicians which notes to play. The address bus tells the memory where to find the data the microprocessor needs, and the data bus carries the actual data itself.
5. The ALU (Arithmetic Logic Unit):
The ALU is the workhorse of the microprocessor, performing all the mathematical and logical operations. It's like the percussion and wind instrument sections of the orchestra, responsible for creating the sounds based on the conductor's instructions. The ALU can perform various operations like addition, subtraction, multiplication, division, AND, OR, and NOT gates. These operations are crucial for calculations, comparisons, and decision-making within a computer program.
Working Together:
These components collaborate seamlessly to achieve the common goal of executing instructions and processing data. The microprocessor fetches instructions using the address bus, decodes them, and based on the instruction, retrieves data from memory via the data bus. The ALU then performs the necessary calculations or logical operations on the data stored in the registers. The results are then stored back in registers or memory, and the process continues for the next instruction. Through this coordinated effort, the microprocessor orchestrates the entire computer's operations.
The Control Unit and Memory Elements Orchestrating the Flow
Building upon our understanding of the core microprocessor components, let's explore two crucial aspects: the control unit and memory elements.
The Control Unit:
The control unit acts as the central nervous system of the microprocessor. It interprets the instructions fetched from memory and generates control signals to coordinate the entire processing operation. Imagine the control unit as the conductor's baton, directing each section of the orchestra (other microprocessor components) what to do at each step.
Here are some key control signals issued by the control unit:
Read (R/W) Control Lines: These lines specify whether the microprocessor wants to read data from memory (Read) or write data to memory (Write). It's like the conductor indicating whether the musicians need to retrieve their sheet music (read) or put their instruments away (write).
I/O Control Signals: These signals manage communication between the microprocessor and peripheral devices (printers, keyboards, etc.). The control unit sends instructions and data to these devices using specific control lines. Think of this as the conductor signaling to a specific section of the orchestra (like the percussion) to play a particular part.
The Memory Element:
The memory element encompasses various control signals that ensure smooth communication between the microprocessor and memory (RAM). These signals synchronize data flow and maintain processing efficiency.
Reset: This signal, often triggered by a button press or power cycle, initializes the microprocessor. It sets all internal registers and control circuits to a predefined state, similar to how the conductor might gather the orchestra and prepare them for the first note.
Ready: This signal originates from the memory and indicates whether it's ready to receive data from or send data to the microprocessor. Imagine the musicians raising their hands to signal they're prepared to play the next section. The microprocessor waits for this "Ready" signal before proceeding, ensuring data transfer happens at the right time.
Wait States: If the memory is not fast enough to keep up with the microprocessor's processing speed, it can assert a "Wait State" signal. This essentially pauses the microprocessor until the memory is ready. Think of the conductor briefly pausing to allow a slower section of the orchestra to catch up before continuing with the music.
Working
The control unit and memory elements play a vital role in ensuring the smooth execution of instructions. The control unit interprets instructions and issues control signals, while the memory element provides data and coordinates data transfer through Reset, Ready, and Wait State signals. This coordinated effort ensures the microprocessor efficiently fetches, decodes, executes instructions, and processes data – just like a conductor leading the orchestra to create a musical masterpiece.
Memory Referencing and Data Movements:
In the world of computer architecture, memory referencing and data movements form the foundation of how data is accessed, manipulated, and transported within the system. Here's a breakdown of these concepts:
Memory Referencing:
Imagine a vast library with countless bookshelves and books. Memory referencing is akin to the process of finding a specific book in the library. It involves the microprocessor specifying the exact location of data within the computer's memory (RAM). This location is identified using a memory address, similar to a call number in the library.
Components Involved:
Memory Address Register (MAR): This register holds the memory address of the data the microprocessor wants to access. Think of this as the librarian noting down the call number of the book you requested.
Memory Data Register (MDR): This register temporarily stores the data retrieved from or written to memory based on the memory address. Imagine this as the librarian bringing the requested book to you.
Data Movements:
Once the microprocessor has referenced the desired memory location, data movements come into play. This refers to the actual transfer of data between various components within the computer system. Data movement involves instructions that specify the source and destination of the data, similar to how you might move a book from one shelf to another in the library.
Types of Data Movements:
Load: This instruction copies data from memory (source) to a register (destination). Think of this as taking a book (data) from the shelf (memory) and placing it on your reading table (register).
Store: This instruction copies data from a register (source) to memory (destination). Think of this as putting the book (data) back on the shelf (memory) from your reading table (register).
Register-to-Register Transfer: This instruction moves data between registers within the microprocessor itself. Imagine moving a book from one table to another within the library (the microprocessor).
Working Together:
Memory referencing and data movements work hand-in-hand to ensure efficient data access and manipulation. The microprocessor uses memory referencing to locate the data, and data movement instructions facilitate the actual transfer of data between memory, registers, and other components. This coordinated effort allows the microprocessor to execute instructions, perform calculations, and process information smoothly.
Analogy:
Imagine a conductor (microprocessor) leading an orchestra (computer system). The sheet music (instructions) specifies what notes (data) need to be played. Memory referencing is like the conductor pointing to the specific location (memory address) in the sheet music where the notes are written. Data movements are then like the musicians (registers and other components) playing their instruments (data) based on the conductor's signals (instructions). Through this collaboration, the orchestra creates beautiful music (processed information) just like the computer system performs its tasks.
Comparison of different microprocessors
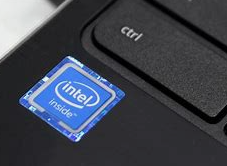
Intel:
Image:
Description: A leading innovator in microprocessor technology for decades. Intel's x86 architecture has been the dominant force in personal computers (PCs). They are known for their high performance Core i series (i3, i5, i7, i9) and Xeon processors for servers and workstations.
AMD (Advanced Micro Devices):
Image:
Description: A major competitor to Intel, offering competitive processors at often lower price points. AMD's Ryzen series processors compete directly with Intel's Core series in performance and are popular choices for both desktops and laptops.
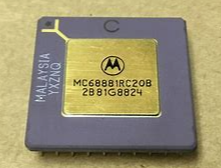
Motorola (Freescale Semiconductor):
Image:
Description: Previously a major player in the microprocessor market, particularly known for their 68000 series processors used in early Apple Macintosh computers and Amiga computers. Freescale Semiconductor acquired Motorola's processor division in 2004, and the company is now part of NXP Semiconductors.
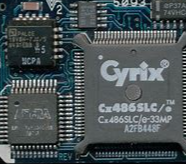
Cyrix (VIA Technologies):
Image:
Description: Known for their x86-compatible processors in the late 1990s and early 2000s, such as the 6x86 and Cyrix III. VIA Technologies acquired Cyrix in 1997 and continues to produce embedded processors.
Comparison Table
Feature
Intel
AMD
Motorola
Cyrix
Founding Year
1968
1969
1955
1968
Market Focus
PCs, Servers
PCs, Servers
Embedded Systems
Early PCs
Architecture
x86 Dominant
x86 Compatible
68000 Series
x86 Compatible
Popular Lines
Core i series, Xeon
Ryzen series
680x0
6x86, Cyrix III
Current Status
Market Leader
Strong Competitor
Acquired (NXP)
Acquired (VIA)
Resolving a Freezing or Slow Computer
A computer freezing or running slowly can be frustrating, but there are several methods you can try to diagnose and fix the issue. Here's a breakdown of various approaches, ranging from simple solutions to more advanced troubleshooting:
1. Basic Checks and Maintenance:
Restart the Computer: Often, a simple restart can resolve temporary glitches or clear overloaded memory.
Close Unnecessary Programs: Running too many programs simultaneously can consume resources and slow down your system. Close any programs you're not actively using.
Check for Background Processes: Some programs might run silently in the background, consuming resources. Use your system's task manager to identify and close unnecessary background processes.
Scan for Malware: Malware infections can significantly slow down your computer. Run a reputable antivirus scan to detect and remove any malicious software.
Disk Cleanup: Over time, your hard drive can accumulate temporary files and unused programs. Use your system's built-in disk cleanup tool to remove unnecessary files and free up storage space.
Defragmentation (HDDs only): For computers with traditional hard disk drives (HDDs), running a disk defragmentation utility can improve performance by reorganizing fragmented data on the drive. (Note: Solid-state drives (SSDs) don't typically require defragmentation.)
2. Hardware and Software Updates:
Update Operating System: Outdated operating systems can sometimes lead to performance issues. Install the latest updates for your operating system to ensure optimal performance and security.
Update Device Drivers: Outdated device drivers can also cause conflicts and slowdowns. Update your device drivers, especially the graphics card driver, for better compatibility and performance.
3. Resource Management:
Check for Resource Usage: Use your system's task manager to monitor CPU, memory, and disk usage. If any of these resources are consistently maxed out, it can lead to slowdowns or freezes.
Increase RAM (if possible): If your computer has sufficient RAM slots and your system allows it, consider adding more RAM to improve overall system performance.
4. Advanced Troubleshooting:
Hard Drive Issues: A failing hard drive can cause freezing and slowdowns. Running a disk check utility can identify potential errors on the hard drive. In severe cases, data recovery or hard drive replacement might be necessary. (Important Note: If you suspect a failing hard drive and data recovery is critical, consult a data recovery professional before attempting any further troubleshooting steps yourself.)
Overheating: Excessive heat can cause instability and freezing. Ensure proper ventilation for your computer and clean dust buildup from fans and heatsinks. Consider replacing thermal paste between the CPU and heatsink if it's old or dry. (Caution: Applying thermal paste requires care and following proper procedures. Refer to your system's manual or consult a professional if needed.)
5. Professional Help:
If you've exhausted all the possible solutions above and your computer continues to freeze or run slowly, consider seeking assistance from a qualified computer technician. They can diagnose hardware or software issues beyond the scope of basic troubleshooting and perform repairs or recommend component replacements.
A Computer Failing to Boot Up
A computer failing to boot up can be nerve-wracking, but there are several troubleshooting steps you can take to identify and potentially fix the issue. Here's a roadmap to diagnose and potentially revive your unbootable computer:
1. Check the Basics (Power & Display):
Power Supply: Ensure your computer is properly plugged into a working outlet and the power switch is turned on. Verify that all power cables are securely connected to the power supply unit (PSU) and the motherboard.
Monitor Connection: Make sure the monitor cable is firmly plugged into both the computer's video output port (HDMI, DisplayPort, etc.) and the monitor itself. Try a different monitor if available to rule out a monitor issue.
2. Listen for POST Beeps:
During startup, the computer performs a Power-On Self-Test (POST). If a beep code sequence sounds, consult your motherboard manual to decipher the meaning of those beeps. The beep codes can indicate specific hardware failures, helping narrow down the problem.
3. Boot Device Priority:
Enter BIOS/UEFI Setup: Most computers have a key combination (like F2, F8, or Del) you need to press during startup to enter the BIOS (Basic Input/Output System) or UEFI (Unified Extensible Firmware Interface) settings. Refer to your motherboard manual for the specific key combination.
Check Boot Order: In the BIOS/UEFI settings, ensure the hard drive containing your operating system is listed as the first boot device. This tells the computer where to look for the operating system files to boot from.
4. Common Causes and Solutions:
Loose Cable Connections: Open your computer case (refer to your system's manual for safe opening instructions) and reseat all data and power cables connected to the hard drive, motherboard, and other components. A loose cable can prevent the system from detecting critical hardware.
Hard Drive Failure: A failing hard drive can prevent the system from booting. You might hear clicking or grinding noises coming from the drive. While data recovery might be possible in some cases, consider the severity of the failure and the importance of the data on the drive. (Important Note: If you suspect a failing hard drive and data recovery is critical, consult a data recovery professional before attempting any further troubleshooting steps yourself.)
Corrupted System Files: Sometimes, corrupted system files can prevent the system from booting normally. Your operating system might have built-in repair tools you can attempt to run from a bootable USB drive or recovery disc.
5. Advanced Troubleshooting:
Boot from External Media: Create a bootable USB drive containing a recovery image of your operating system or a diagnostic Linux distribution. Try booting your computer from the USB drive. If the computer boots from the USB drive, it might indicate a problem with your hard drive or operating system installation on the internal drive.
Reset CMOS Settings: The CMOS (Complementary Metal-Oxide Semiconductor) chip stores BIOS settings. Sometimes, resetting the CMOS settings to defaults can resolve boot issues caused by incorrect BIOS configurations. Consult your motherboard manual for instructions on how to reset the CMOS settings. (Caution: Resetting CMOS might clear other BIOS settings like overclocking configurations or custom boot options. Make sure you know how to reconfigure these settings if needed.)
6. Professional Help:
If you've exhausted all these troubleshooting steps and your computer remains unbootable, consider seeking assistance from a qualified computer technician. They can diagnose hardware or software issues beyond the scope of basic troubleshooting and perform repairs or recommend component replacements.
CMOS Error:
Reset the CMOS Settings:
Power Down and Unplug: Ensure your computer is completely turned off and unplugged from the power outlet.
Open the Case: Carefully open your computer case following your system's manual for safe opening instructions.
Locate the CMOS Jumper: Find the CMOS jumper on your motherboard. It will typically be a small, two-pin jumper labeled "CMOS," "CLR CMOS," "CLEAR," or similar. Consult your motherboard manual for the exact location and jumper settings.
Clear the CMOS Settings: Move the jumper from its current position to the pins labeled "Clear" or "CLR" for a few seconds (usually around 10-15 seconds). This clears the current CMOS settings.
Reset the Jumper: Move the jumper back to its original position as indicated in the motherboard manual.
Close the Case and Restart: Close your computer case securely, reconnect all cables, plug in the power cord, and restart your computer.
Replace the CMOS Battery:
Follow Steps 1a and 1b above (Power Down and Unplug, Open the Case).
Locate the CMOS Battery: Find the CMOS battery on your motherboard. It's usually a round, silver battery held down by a small metal clip.
Remove the Old Battery: Carefully remove the old battery by gently prying it out of its socket with your fingers or a non-conductive tool (like a plastic spudger).
Replace with a New Battery: Replace the old battery with a new battery of the same type (usually a CR2032). Ensure the positive (+) and negative (-) sides of the battery match the markings on the socket.
Close the Case and Restart: Close your computer case securely, reconnect all cables, plug in the power cord, and restart your computer.
Update BIOS (if necessary): In some cases, outdated BIOS firmware can contribute to CMOS errors. Updating the BIOS can potentially resolve compatibility issues and improve system stability. However, updating the BIOS can be risky if not done correctly. It's recommended to only update the BIOS if you're comfortable with the process and have downloaded the correct update for your specific motherboard model from the manufacturer's website. Consult your motherboard manual for detailed instructions on updating the BIOS.
Noisy Hard Disk Drive
The grinding, clicking, or whirring noises emanating from your hard disk drive (HDD) can be concerning. Here are some troubleshooting steps:
Software Issues:
Disk Check: Run a disk check utility provided by your operating system to identify and potentially fix file system errors that might be causing the noise.
Defragmentation (HDDs only): For traditional HDDs, running a disk defragmentation utility can improve performance and potentially reduce noise caused by excessive head movement. (Note: Solid-state drives (SSDs) don't require defragmentation.)
Hardware Issues:
Dust Buildup: Excessive dust buildup inside your computer can impede airflow and contribute to overheating, which can cause the hard drive to make noise. Open your computer case (refer to your system's manual for safe opening instructions) and clean the dust from the fans and vents. (Important Safety Note: Always ensure your computer is unplugged and turned off before opening the case.)
Failing Hard Drive: Unfortunately, noisy hard drives are often a sign of impending failure. Back up your important data immediately as the drive might fail completely soon. Consider replacing the hard drive with a new one.
Keyboard Keys Not Working
Several factors can cause keyboard keys to malfunction. Here's how to troubleshoot:
Basic Checks:
Physical Obstructions: Ensure no crumbs, dust, or foreign objects are lodged beneath the keys, preventing them from registering presses. Try compressed air to blow out any debris.
Loose Connections: If it's a wired keyboard, check for a loose connection at the USB port. Try unplugging and replugging the cable securely.
Wireless Keyboard Issues: For wireless keyboards, ensure they're powered on and have sufficient battery life. Replace batteries if needed, and verify they're oriented correctly. Check if the wireless receiver is properly plugged into a USB port on your computer.
Software Issues:
Driver Issues: Outdated or corrupted keyboard drivers can sometimes cause malfunctioning keys. Update your keyboard driver through your operating system's device manager.
Restart: A simple computer restart can sometimes resolve temporary glitches causing keyboard issues.
Hardware Issues:
Faulty Keyboard: If the above steps don't resolve the problem, the keyboard itself might be faulty. Consider replacing the keyboard.
Video Card Faults
Problems with your video card can manifest as visual artifacts (distortion, flickering), display issues (no signal, incorrect resolution), or even system crashes. Here are some approaches:
Software Issues:
Driver Issues: Outdated or corrupted video card drivers can cause various display problems. Update your video card driver from the manufacturer's website (Nvidia, AMD, etc.) for your specific video card model.
Software Conflicts: Certain software or games might conflict with your video card drivers. Try uninstalling recently installed programs or running the program/game in compatibility mode.
Hardware Issues:
Overheating: Excessive heat can cause video card instability and artifacts. Ensure proper airflow within your computer and clean dust buildup from the fans and vents of the video card. Consider replacing thermal paste between the video card's GPU and heatsink if it's old or dry. (Caution: Applying thermal paste requires care and following proper procedures. Refer to your system's manual or consult a professional if needed.)
Failing Video Card: In some cases, the video card itself might be failing. If none of the above solutions work, consider replacing the video card, although this can be a more expensive repair.
How to Diagnose and Potentially Fix Common Problems Related to Fans, Memory, and Screens/Monitors
Fan Problems
Symptoms: Your computer might overheat, leading to shutdowns, performance issues, or unusual fan noises (grinding, rattling).
Troubleshooting Steps:
Clean Dust Buildup: Open your computer case (refer to your system's manual for safe opening instructions) and clean dust buildup from the fans and vents. Dust can impede airflow and cause overheating. (Important Safety Note: Always ensure your computer is unplugged and turned off before opening the case.)
Check Fan Functionality: Ensure all fans are spinning freely and not obstructed by cables. If a fan isn't spinning, check its connection to the motherboard and ensure it's receiving power. Some motherboards allow manual fan speed control in the BIOS settings.
Replace Faulty Fans: If a fan is damaged or not working properly, consider replacing it with a new fan compatible with your system.
Memory Problems
Symptoms: You might experience random crashes, freezing, blue screens of death (BSODs), or slow system performance.
Troubleshooting Steps:
Memory Diagnostics: Most operating systems have built-in memory diagnostic tools. Run a memory check to identify potential RAM (Random Access Memory) errors.
Reseat Memory Modules: Open your computer case and carefully remove and reseat the memory modules in their slots. Ensure they are pushed in firmly and seated correctly.
Test with Different Memory Sticks: If reseating doesn't resolve the issue, try using a different set of memory modules (if possible) to isolate the problem. Incompatible or faulty RAM can cause memory errors.
Screen/Monitor Problems
Symptoms: You might encounter display issues like flickering, distortion, lines across the screen, no signal, or incorrect resolution.
Troubleshooting Steps:
Basic Checks: Ensure the monitor cable is securely plugged into both the computer's video output port (HDMI, DisplayPort, etc.) and the monitor itself. Try a different cable if available to rule out a cable issue.
Monitor Settings: Check the monitor's own settings menu for adjustments like brightness, contrast, and resolution.
Video Card Drivers: Outdated or corrupted video card drivers can cause display problems. Update your video card driver from the manufacturer's website (Nvidia, AMD, etc.) for your specific video card model.
Test on Another Monitor: If possible, connect your computer to a different monitor to see if the problem persists. This helps isolate whether the issue lies with the computer or the monitor itself.
Advanced Troubleshooting (For Computer): For issues potentially related to the computer's video card (assuming a different monitor works fine), refer to the "Video Card Faults" section in the previous response for troubleshooting steps like checking for overheating or considering replacing the video card (if necessary).
Mouse and Touchpad Problems, and Dysfunctional USB Ports
Mouse or Touchpad Problems
Both mice and touchpads can malfunction, causing frustration. Here's how to troubleshoot:
Mouse Issues
Basic Checks:
Physical Connection: Ensure the mouse cable is securely plugged into the USB port. Try a different USB port if available.
Wireless Mouse:
Check batteries and replace them if needed.
Verify the wireless receiver is properly plugged into a USB port.
Make sure the mouse is turned on (if it has a power switch).
Software Issues:
Drivers: Update your mouse driver through your operating system's device manager.
Restart: A simple computer restart can sometimes resolve temporary glitches.
Software Conflicts: Certain software might interfere with mouse functionality. Try temporarily disabling recently installed programs.
Hardware Issues:
Faulty Mouse: If the above steps don't work, the mouse itself might be faulty. Consider using a different mouse to confirm.
Touchpad Issues
Basic Checks:
Enable Touchpad: Ensure the touchpad is enabled in your system settings (often under "Mouse" or "Touchpad" settings).
Clean Touchpad: A dirty touchpad can affect responsiveness. Use a slightly damp cloth to clean the surface.
Software Issues:
Drivers: Update your touchpad driver through your operating system's device manager.
Restart: A simple computer restart can sometimes resolve temporary glitches.
Hardware Issues:
Physical Damage: If the touchpad is physically damaged (cracked, buttons not clicking properly), it might require professional repair or replacement.
Dysfunctional USB Ports
Faulty USB ports can prevent your mouse, keyboard, or other USB devices from functioning correctly. Here's how to diagnose and fix them:
Basic Checks:
Secure Connection: Ensure your USB device is plugged in firmly. Try a different USB port on your computer.
Debris: Compressed air can help remove dust or debris that might be lodged inside the USB port.
Device Issues: Try the device on another computer to see if the problem lies with the device itself.
Software Issues:
Device Manager: Check your operating system's device manager for any error messages related to the USB port. Update or reinstall the USB controller drivers.
Restart: A simple computer restart can sometimes resolve temporary glitches with USB ports.
Hardware Issues:
Internal Damage: If the above steps don't work, the USB port itself might be damaged internally. This might require professional repair or, depending on the severity, motherboard replacement.
Developing Test Criteria and Functional Tests for Repaired Hardware
Here's a breakdown of how to develop test criteria and apply functional tests to ensure repaired hardware is functioning properly:
1. Develop Test Criteria:
Identify Hardware: Begin by clearly defining the type of hardware that was repaired (e.g., CPU, motherboard, memory, hard drive, graphics card, etc.).
Functionality: List the core functionalities of the repaired hardware. What is it expected to do?
Performance: Define the expected performance benchmarks for the hardware. This could involve factors like speed, processing power, memory capacity, or video resolution.
Compatibility: Ensure the repaired hardware is compatible with other components in the system.
Stress Testing: Consider incorporating stress tests that push the hardware to its limits to identify any potential weaknesses or stability issues.
Here's an example test criteria table for a repaired CPU:
Test Criteria
Description
Functionality
CPU boots up the computer and runs the operating system.
Performance
CPU benchmark scores meet or exceed pre-repair values or manufacturer specifications.
Compatibility
CPU is recognized by the motherboard and functions properly with other system components.
Stress Testing
CPU runs a stability test software for an extended duration without overheating, crashing, or errors.
2. Apply Functional Tests:
Visual Inspection: Perform a basic visual inspection of the repaired hardware for any signs of physical damage, improper installation, or loose components.
Diagnostic Tools: Utilize diagnostic tools specific to the hardware being tested. Many manufacturers provide diagnostic tools or utilities for their components. Operating systems might also have built-in diagnostic tools for certain hardware components.
Benchmarking Software: Run benchmark software to measure the performance of the repaired hardware and compare it to expected values or pre-repair performance.
Stress Testing: Subject the repaired hardware to stress testing software that pushes it to its limits and monitors for stability, overheating, or errors.
Important Considerations:
Test Scope: The specific test criteria and functional tests will vary depending on the type of hardware repaired and its intended use. A simple home computer might have less stringent requirements compared to a high-performance gaming PC.
Documentation: Refer to the hardware manufacturer's documentation or repair instructions for specific testing recommendations.
Data Backup: Always back up your data before running any tests that might involve data loss, especially when testing storage devices like hard drives.
Safety Precautions: When testing certain hardware components like power supplies, follow proper safety precautions to avoid electrical hazards.
Applying Qualitative Assessments and Documenting Tests for Repaired Hardware
1. Applying Qualitative Assessments:
Functional Success: The primary assessment involves determining if the repaired hardware fulfills its core functionalities as defined in the test criteria. Did the CPU boot the computer? Did the memory run without errors? Did the video card display visuals correctly?
Performance Evaluation: Go beyond simply functioning and assess if the performance meets or exceeds expectations. Did the CPU benchmark score reach pre-repair levels or manufacturer specifications? Did the memory handle workloads smoothly?
Stability and Reliability: During stress testing, observe if the repaired hardware maintains stability. Did the CPU overheat or crash during the stress test? Did the memory exhibit any errors under pressure?
User Experience: In some cases, consider a subjective assessment of user experience. Does the repaired keyboard feel responsive and comfortable to type on? Does the touchpad track smoothly and accurately?
Qualitative Assessment Example (Repaired CPU):
The CPU successfully booted the computer and loaded the operating system, fulfilling its core functionality.
Benchmark scores fell within the expected range for the CPU model, indicating good performance.
The CPU ran a stress test for an hour without overheating, crashing, or exhibiting errors, demonstrating stability.
2. Documenting Tests Carried Out:
Test Plan: Create a formal test plan outlining the specific test criteria, functional tests to be conducted, and expected outcomes.
Test Log: Maintain a detailed test log throughout the process. This log should record:
Date and Time of Testing
Hardware Being Tested (including model number, serial number, etc.)
Specific Functional Tests Performed
Results of Each Test (Pass/Fail)
Observations During Testing (e.g., error messages, unexpected behavior)
Provides a record: A well-documented testing process provides a clear record of the repairs performed, the tests conducted, and the results obtained. This can be helpful for future reference or troubleshooting.
Improves repeatability: Detailed documentation allows for replicating the testing process if necessary, ensuring consistency and reliability in test results.
Facilitates communication: Clear documentation can facilitate communication between technicians, allowing them to understand the repairs performed and the testing procedures followed.
Operationalizing Repaired Hardware, Condemning Unrepairable Hardware, and Deploying Repaired Hardware
1. Operationalizing Repaired Hardware:
Final Cleaning and Inspection: Once testing is complete and you're confident in the functionality of the repaired hardware, perform a final cleaning to remove any dust, debris, or fingerprints. Do a final visual inspection to ensure everything is properly seated and there are no loose components.
System Reassembly: If the repairs involved disassembling the system (e.g., replacing a CPU or RAM), carefully reassemble the system following the manufacturer's instructions or your disassembly notes. Ensure proper cable connections and secure all components.
Software Installation/Updates: Depending on the repaired hardware, you might need to reinstall the operating system or update drivers.
Data Restoration (if applicable): If you were working with data storage devices like hard drives, and data recovery was part of the repair process, this is the stage where you would restore the recovered data back onto the operational drive. (Important Note: Ensure proper data recovery procedures were followed to avoid further data loss.)
2. Condemning Unrepairable Hardware:
Documentation: For hardware deemed beyond repair, create a clear record outlining the attempted repairs, the test results that indicated failure, and the justification for condemning the hardware.
Data Destruction (if applicable): If the condemned hardware contains storage devices with sensitive data, ensure proper data destruction procedures are followed to prevent unauthorized access to that information.
Disposal: Dispose of the condemned hardware responsibly according to electronic waste (e-waste) regulations in your area. E-waste recycling facilities can handle these components in an environmentally responsible manner.
3. Deploying Repaired Hardware:
Individual Component Replacement: If the repair involved a single component like a memory module or graphics card, you can deploy the repaired hardware back into the original system that required the repair.
Full System Redeployment: If the repairs involved a major overhaul or required disassembling the entire system, then the redeployment process involves setting up the entire system again. This might involve connecting peripherals, monitors, and reinstalling software specific to the user's needs.
Testing and Verification: Once the repaired hardware is deployed (either as a single component or a complete system), perform a final round of testing to verify functionality in its operational environment.
Following Your Organization's Computer Equipment Disposal Policy
Here's how to handle both deployment of repaired hardware and disposal of irreparable hardware according to your organization's computer equipment disposal policy:
1. Deployment of Repaired Hardware:
Follow General Deployment Steps: Refer to the "Deploying Repaired Hardware" section in the previous response for the general steps involved in getting your repaired hardware back into operation. (Final cleaning, system reassembly, software considerations, data restoration if applicable)
Document Deployment: Maintain a record of the deployment process. This documentation should include:
Date of Deployment
Hardware Deployed (including model number, serial number, etc.)
System/User the Hardware was Deployed To
Any Specific Notes Regarding Deployment (e.g., software configuration, user training provided)
2. Disposal of Unrepairable Hardware:
Consult Your Organization's Policy: Every organization should have a documented computer equipment disposal policy. This policy will outline the specific procedures for disposing of electronic waste (e-waste) in an environmentally responsible and secure manner. Look for this policy on your organization's intranet, IT department website, or consult with your IT department directly.
Typical Disposal Procedures: While the specifics will vary by organization, some common disposal procedures might include:
Using certified e-waste recycling facilities: These facilities specialize in handling electronic waste and ensure proper dismantling, material recovery, and responsible disposal of hazardous components.
Internal Asset Recovery Programs: Some organizations might have internal programs for recovering usable components from old equipment. These components can then be used for repairs or spare parts for other systems.
Secure Data Destruction: If the condemned hardware contains storage devices with sensitive data, ensure proper data destruction procedures are followed to prevent unauthorized access to that information. Your organization's IT department can advise on these procedures.
Document Disposal: Maintain a record of the disposal process for the irreparable hardware. This documentation should include:
Date of Disposal
Hardware Disposed Of (including model number, serial number, etc.)
Disposal Method Used (e.g., e-waste recycling facility name, internal asset recovery program details)
Importance of Documentation:
Audit Trail: Provides a clear audit trail for tracking hardware throughout its lifecycle, from deployment to disposal. This can be helpful for internal audits or regulatory compliance purposes.
Security: Documents the steps taken to ensure secure data destruction on storage devices before disposal.
Environmental Responsibility: Provides a record of responsible e-waste disposal practices.
Remember:
Always prioritize the security of any sensitive data stored on the hardware before disposal.
Follow your organization's specific computer equipment disposal policy for compliant and responsible disposal practices.

 Function: Protects sensitive electronic components from electrostatic discharge (ESD) which can damage them during repairs or upgrades. When working on a computer's internals, it's crucial to wear a grounded wrist strap and use an ESD-safe mat to dissipate static electricity.
 Function: Required for opening computer cases, replacing components like RAM or storage drives, and making various adjustments. A good set includes Phillips head, flathead, and Torx screwdrivers in various sizes to fit different screws encountered in computer hardware.
 Function: Provides illumination for seeing into tight spaces within a computer case, especially helpful when inspecting components or troubleshooting cabling issues.
 Function: A versatile tool for measuring voltage, current, and resistance. It can be used to diagnose power supply issues, check for continuity in circuits, and troubleshoot faulty components.
 Function: Safely removes dust buildup from computer components like fans, heatsinks, and vents. Dust accumulation can impede airflow and lead to overheating, so regular cleaning is essential for maintaining optimal system performance.
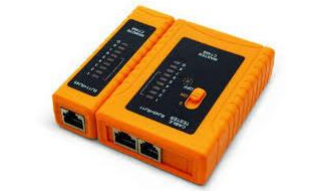 Function: Helps identify faulty network cables (Ethernet cables) that might be causing connectivity problems. A cable tester can quickly diagnose cable integrity and pinpoint issues like breaks or shorts in the wiring.
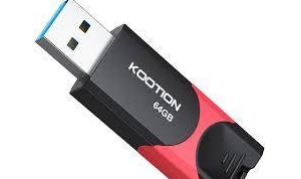 Function: Useful for transferring files, running diagnostic tools, or installing operating systems. Technicians often carry bootable USB drives containing system recovery tools or diagnostic software.
 Function: Provides a safe and organized way to transport tools and spare parts to various work locations. A well-compartmentalized case protects tools from damage and keeps them readily accessible.
 Zip Ties Image:
 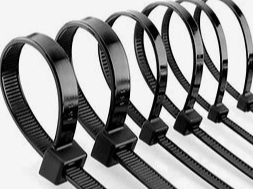 Function: Aid in cable management within the computer case. Zip ties and velcro straps help keep cables organized and prevent them from obstructing airflow or creating clutter.
 Image:
  Function: Essential for documenting troubleshooting steps, keeping track of error codes, and recording notes during repairs or maintenance procedures.